Food
Slutty Cheesecake Bars: The Ultimate Indulgent Dessert
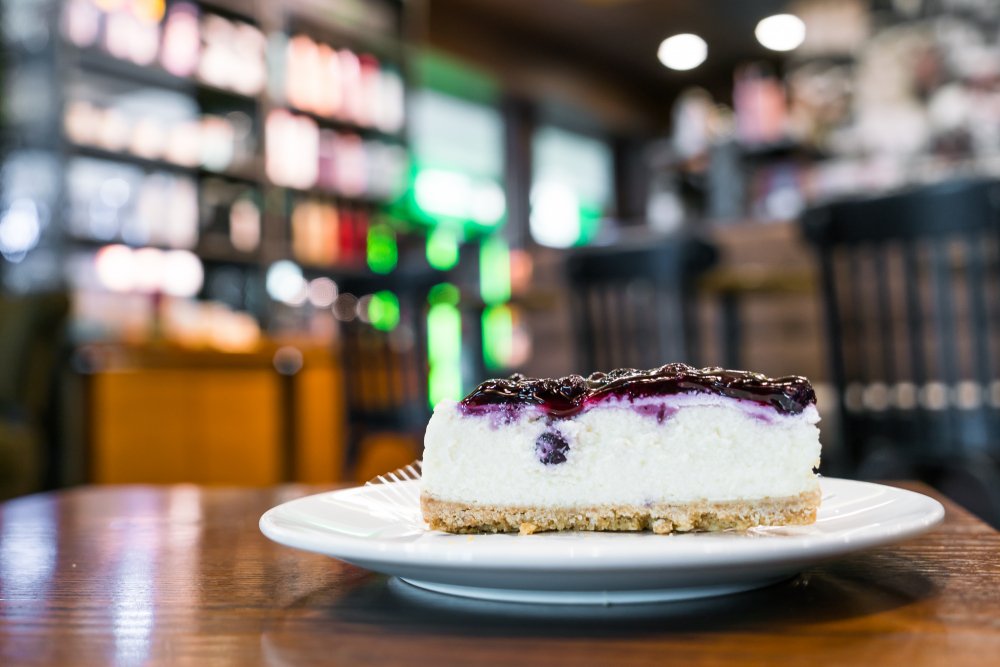
Imagine biting into a dessert that layers gooey chocolate chip cookie dough, rich Oreo crumbs, and creamy cheesecake—all in one sinful bite. That’s exactly what Slutty Cheesecake Bars deliver. This viral dessert has taken social media by storm, and for good reason—it’s decadent, easy to make, and impossible to resist.
But what makes these bars so irresistible? Are they just a trend, or do they deserve a permanent spot in your dessert rotation? In this guide, we’ll break down everything you need to know—from the origins of slutty cheesecake bars to expert baking tips and mouthwatering variations.
What Are Slutty Cheesecake Bars?
The name might raise eyebrows, but the flavor will win you over. Slutty Cheesecake Bars are a layered dessert combining:
- A buttery chocolate chip cookie base – Soft, chewy, and packed with chocolate.
- A middle layer of Oreos (or similar cookies) – Adding crunch and a hint of vanilla.
- A smooth, velvety cheesecake topping – Creamy and slightly tangy to balance the sweetness.
The term “slutty” in baking often refers to indulgent, over-the-top desserts that combine multiple guilty pleasures—hence the name. Think of it as the dessert version of a “slutty brownie,” but with cheesecake taking center stage.
Why Everyone’s Obsessed
- Texture heaven – Chewy, crunchy, and creamy in every bite.
- Customizable – Swap Oreos for Nutella, peanut butter cups, or even Biscoff.
- Perfect for parties – Easy to slice, share, and transport.
How to Make Slutty Cheesecake Bars (Step-by-Step Recipe)
Ingredients You’ll Need
(Makes 16 bars)
Cookie Layer
- 1 cup (2 sticks) unsalted butter, softened
- 1 cup brown sugar
- ½ cup granulated sugar
- 2 large eggs
- 1 tsp vanilla extract
- 2 ½ cups all-purpose flour
- 1 tsp baking soda
- ½ tsp salt
- 1 ½ cups chocolate chips
Oreo Layer
- 16-20 Oreo cookies (or any sandwich cookies)
Cheesecake Layer
- 16 oz (2 blocks) cream cheese, room temperature
- ½ cup granulated sugar
- 2 large eggs
- 1 tsp vanilla extract
- ¼ cup sour cream (for extra creaminess)
Instructions
Step 1: Prep the Cookie Base
- Preheat oven to 350°F (175°C) and line a 9×13-inch baking pan with parchment paper.
- In a bowl, cream butter and sugars until fluffy. Add eggs and vanilla, mixing well.
- Whisk flour, baking soda, and salt, then gradually mix into wet ingredients. Fold in chocolate chips.
- Press dough evenly into the pan (it’ll be thick—use wet hands or a spatula).
Step 2: Add the Oreo Layer
- Place Oreos in a single layer over the cookie dough. Press gently to adhere.
Step 3: Make the Cheesecake Topping
- Beat cream cheese and sugar until smooth.
- Add eggs one at a time, then mix in vanilla and sour cream.
- Pour over Oreos, spreading evenly.
Step 4: Bake & Chill
- Bake for 35-40 minutes until edges are set but the center is slightly jiggly.
- Cool at room temp for 1 hour, then refrigerate for at least 4 hours (overnight is best).
- Slice into bars and serve!
Pro Tips for the Best Slutty Cheesecake Bars
✅ Room-temperature ingredients – Ensures smooth mixing, no lumps.
✅ Don’t overbake – The cheesecake should wobble slightly when shaken.
✅ Chill thoroughly – This prevents a gooey mess when slicing.
✅ Customize it! Try:
- Peanut Butter Lovers: Swap Oreos for Reese’s cups.
- Salted Caramel: Drizzle caramel sauce on top.
- Biscoff Version: Use Biscoff cookies and swirl in cookie butter.
Why This Dessert Works (The Science of Layers)
According to pastry chefs, the magic of slutty cheesecake bars lies in:
- Contrasting textures – Soft cookie, crunchy Oreo, smooth cheesecake.
- Balanced sweetness – The tangy cheesecake cuts through the sugar.
- Visual appeal – The layers make it Instagram-worthy.
“Desserts with multiple textures keep each bite interesting,” says Chef Emily Carter, a baking instructor. “That’s why layered treats like this always trend.”
Serving & Storage Tips
🍽 Serve with:
- A scoop of vanilla ice cream
- Fresh berries for a tart contrast
- A dusting of cocoa powder
🗄 Storage:
- Fridge: 5 days in an airtight container.
- Freezer: Up to 3 months (thaw in fridge before serving).
Final Verdict: Should You Make Slutty Cheesecake Bars?
If you love decadent, shareable desserts that are easy yet impressive, this recipe is a must-try. Whether for a potluck, birthday, or just a sweet weekend treat, these bars deliver on flavor, texture, and sheer indulgence.
Ready to bake your batch? Tag us on social media with your creations—we’d love to see your twist on this viral dessert!


Is mochi a healthy treat or a hidden sugar bomb?
This chewy, sweet Japanese delicacy has taken the world by storm, appearing in everything from ice cream to trendy desserts. But beyond its delightful texture and versatility, how does mochi stack up nutritionally? Is it a smart choice for health-conscious eaters, or should it be an occasional indulgence?
In this article, we’ll explore mochi’s health benefits, potential downsides, and expert-backed tips for enjoying it without guilt. Whether you’re a mochi lover or just curious, you’ll walk away with a clear understanding of how this treat fits into a balanced diet.
What Is Mochi? A Quick Primer
Mochi is a traditional Japanese rice cake made from mochigome (glutinous rice). The rice is pounded into a sticky, elastic dough, then shaped into cakes or filled with sweet or savory ingredients.
Popular variations include:
- Daifuku (filled with sweet red bean paste)
- Mochi ice cream (filled with ice cream)
- Kinako mochi (coated in roasted soybean flour)
- Grilled mochi (yaki mochi, often served with soy sauce)
While mochi is naturally gluten-free (since it’s made from rice), modern versions may include additives, sugars, and artificial flavors. So, how healthy is it really?
The Health Benefits of Mochi
1. Good Source of Energy (Carbohydrates)
Since mochi is made from glutinous rice, it’s primarily a carbohydrate-rich food. A small piece (about 1 oz or 28g) provides around 100 calories, mostly from carbs. This makes it a quick energy source—ideal for athletes or those needing a pre-workout snack.
2. Naturally Gluten-Free
For those with celiac disease or gluten sensitivity, plain mochi is a safe option. However, always check labels, as some flavored or processed mochi may contain gluten from additives.
3. Low in Fat (Before Fillings!)
Plain mochi contains almost no fat. The health impact depends on what’s inside—traditional red bean paste adds fiber, while ice cream fillings ramp up sugar and fat.
4. Contains Small Amounts of Nutrients
While not a superfood, mochi offers trace amounts of:
- Iron (supports blood health)
- Calcium (important for bones)
- B vitamins (aids metabolism)
However, the quantities are minimal compared to whole grains or vegetables.
Potential Downsides of Mochi
1. High Glycemic Index (GI)
Mochi’s sticky rice is high on the glycemic index, meaning it can spike blood sugar quickly. People with diabetes or insulin resistance should consume it in moderation and pair it with protein or fiber to slow digestion.
2. Choking Hazard
Mochi’s dense, chewy texture makes it a leading cause of choking in Japan, especially among children and the elderly. To reduce risk:
- Cut into small pieces
- Chew thoroughly
- Avoid eating too quickly
3. Added Sugars in Modern Varieties
While traditional mochi is relatively simple, modern versions (like mochi ice cream or chocolate-filled mochi) can be packed with added sugars. A single mochi ice cream ball may contain 10-15g of sugar—nearly half the daily recommended limit for some people.
4. Portion Control is Tricky
Because mochi is soft and bite-sized, it’s easy to overeat. Just two or three pieces can add up to 300+ calories, mostly from refined carbs.
How to Enjoy Mochi the Healthy Way
✅ Choose Nutrient-Dense Fillings
Opt for mochi with:
- Red bean paste (fiber & antioxidants)
- Fresh fruit (like strawberries or mango)
- Nut butters (for protein and healthy fats)
Avoid excessive cream, chocolate, or sweetened versions.
✅ Pair with Protein or Fiber
Balance mochi’s carb-heavy nature by eating it with:
- Greek yogurt
- Nuts
- Green tea (helps digestion)
✅ Make Your Own Mochi
Homemade mochi lets you control ingredients. Try:
- Sugar-free mochi (sweetened with monk fruit or stevia)
- Whole-grain mochi (using brown rice flour)
- Savory mochi (stuffed with veggies or lean protein)
✅ Practice Portion Control
Stick to 1-2 small pieces per serving to avoid blood sugar spikes and excess calories.
Real-World Examples: Mochi in a Balanced Diet
✔ Pre-Workout Snack: A small piece of mochi + almond butter gives quick energy.
✔ Dessert Swap: Instead of cake, try a mochi ball with fresh fruit.
✔ Gluten-Free Treat: Celiac sufferers can enjoy plain mochi safely.
Final Verdict: Is Mochi Healthy?
Mochi Health can be part of a healthy diet—if eaten mindfully. Traditional versions offer a simple, gluten-free carb source, while modern sweet varieties should be occasional treats.
Key Takeaways:
✔ Opt for natural, low-sugar fillings.
✔ Watch portion sizes to avoid overeating.
✔ Be cautious of choking hazards.
✔ Balance mochi with protein or fiber.
So, next time you reach for mochi, ask yourself: Am I choosing a nutrient-packed version or just a sugary indulgence? With the right approach, you can enjoy this delightful treat without derailing your health goals.
Ever crave the nostalgic flavors of a sloppy joe but want something fresher and more exciting? Enter Sloppy Joe Orzo—a brilliant twist on the classic sandwich that combines saucy, savory beef with tender orzo pasta for a hearty, satisfying meal.
This dish is perfect for busy weeknights, potlucks, or whenever you need a crowd-pleaser that’s easy to make. Below, we’ll break down why this recipe works, how to make it perfectly, and some expert-backed tips to take it to the next level.
Why Sloppy Joe Orzo Is a Game-Changer
Sloppy Joes are a beloved American comfort food, but serving the filling over orzo instead of a bun makes it:
✔ More filling – Orzo absorbs the sauce beautifully, making each bite rich and flavorful.
✔ Less messy – No more drippy sandwiches! The pasta holds everything together.
✔ Versatile – Easily customizable with veggies, spices, or even plant-based meat.
Chefs and home cooks alike are embracing pasta-based twists on classics (think cheeseburger pasta or taco spaghetti), and Sloppy Joe Orzo fits right in.
How to Make the Best Sloppy Joe Orzo
Ingredients You’ll Need
- 1 lb ground beef (or turkey, chicken, or lentils for a vegetarian version)
- 1 cup orzo pasta, uncooked
- 1 small onion, diced
- 1 bell pepper, diced (any color)
- 2 cloves garlic, minced
- 1 (15 oz) can tomato sauce
- 2 tbsp tomato paste
- 1 tbsp Worcestershire sauce (or soy sauce for a vegetarian alternative)
- 1 tbsp brown sugar (or maple syrup)
- 1 tsp mustard
- 1 tsp chili powder
- ½ tsp paprika
- Salt & pepper to taste
- 1 cup shredded cheddar cheese (optional)
- Fresh parsley or green onions for garnish
Step-by-Step Instructions
1. Cook the Orzo
- Bring a pot of salted water to a boil and cook orzo according to package instructions (usually 8-10 minutes). Drain and set aside.
2. Brown the Meat
- In a large skillet, cook the ground beef over medium heat until no longer pink. Drain excess fat if needed.
3. Sauté the Veggies
- Add onion, bell pepper, and garlic to the skillet. Cook for 3-4 minutes until softened.
4. Make the Sloppy Joe Sauce
- Stir in tomato sauce, tomato paste, Worcestershire sauce, brown sugar, mustard, chili powder, paprika, salt, and pepper. Simmer for 5-7 minutes until thickened.
5. Combine & Serve
- Mix the cooked orzo into the skillet until well coated. Top with cheese (if using) and let it melt slightly.
- Garnish with fresh herbs and serve hot!
Pro Tips for the Best Results
✅ Boost the umami – Add a splash of soy sauce or a dash of smoked paprika for depth.
✅ Make it spicy – Toss in diced jalapeños or a pinch of cayenne.
✅ Prep ahead – This dish reheats beautifully, making it great for meal prep.
Variations to Try
- Vegetarian? Swap beef for lentils or plant-based crumbles.
- Extra veggies? Add mushrooms, zucchini, or corn.
- Cheesy twist? Stir in cream cheese for a richer texture.
Why This Recipe Works (According to Experts)
Food scientists and chefs agree that combining pasta with saucy, well-seasoned meat creates a perfect flavor balance. Orzo’s small shape ensures every bite is coated evenly, while the acidity from the tomatoes cuts through the richness of the beef.
Final Thoughts: A Must-Try Comfort Food Upgrade
Sloppy Joe Orzo is the ultimate mashup—comforting, easy, and packed with flavor. Whether you’re feeding picky kids, meal prepping, or just craving something new, this dish delivers.
Ready to give it a try? Whip up a batch tonight and see why this recipe is quickly becoming a household favorite. And if you loved it, share your twist in the comments—we’d love to hear how you made it your own!
Ever grilled chicken only to end up with dry, bland results? You’re not alone. Grilling chicken can be tricky, but when done right—especially with a glaze like peach balsamic—it transforms into a juicy, flavor-packed masterpiece.
This peach balsamic grilled chicken recipe combines the natural sweetness of peaches with the rich tang of balsamic vinegar, creating a dish that’s both gourmet and easy to make. Whether you’re hosting a summer BBQ or just craving a restaurant-quality meal at home, this recipe delivers.
Let’s dive into why this dish works, how to make it perfectly, and expert-backed tips to elevate your grilling game.
Why Peach Balsamic Grilled Chicken Works
1. The Perfect Flavor Balance
Peaches bring natural sweetness, while balsamic vinegar adds depth and acidity. When reduced, the glaze caramelizes, creating a sticky, glossy coating that locks in moisture.
Chef’s Tip: “Fruit-based glazes work well with chicken because they balance the meat’s mild flavor without overpowering it.” — Chef Michael Symon, Food Network
2. Healthier Than Store-Bought Sauces
Many bottled marinades contain added sugars and preservatives. A homemade peach balsamic glaze uses fresh ingredients, keeping it naturally sweetened and free from unnecessary additives.
3. Versatile for Any Occasion
This dish pairs well with:
- Grilled vegetables
- Quinoa or couscous
- Fresh summer salads
- Even as a protein-packed pizza topping!
Ingredients You’ll Need
For the Chicken:
- 4 boneless, skinless chicken breasts (or thighs)
- 2 tbsp olive oil
- 1 tsp salt
- ½ tsp black pepper
- 1 tsp garlic powder
- ½ tsp smoked paprika (for depth)
For the Peach Balsamic Glaze:
- 1 cup fresh peaches (diced) or high-quality peach preserves
- ¼ cup balsamic vinegar
- 2 tbsp honey or maple syrup
- 1 tbsp Dijon mustard
- 1 clove garlic (minced)
- ½ tsp red pepper flakes (optional, for heat)
Step-by-Step Cooking Instructions
Step 1: Prep the Chicken
- Pat the chicken dry to ensure even cooking.
- Rub with olive oil, salt, pepper, garlic powder, and smoked paprika.
- Let it sit at room temperature for 15-20 minutes (this prevents toughness).
Step 2: Make the Peach Balsamic Glaze
- In a small saucepan, combine peaches, balsamic vinegar, honey, Dijon, and garlic.
- Simmer on medium-low heat for 8-10 minutes, stirring occasionally, until thickened.
- Blend for a smooth consistency (optional).
Pro Tip: If using fresh peaches, a splash of water helps break them down faster.
Step 3: Grill to Perfection
- Preheat grill to medium-high (375°F-400°F).
- Grill chicken for 5-6 minutes per side, brushing with glaze in the last 2 minutes.
- Check for doneness (internal temp should be 165°F).
Avoid Overcooking: “Chicken breasts dry out fast—pull them at 160°F; they’ll carry over to 165°F while resting.” — America’s Test Kitchen
Step 4: Rest & Serve
Let chicken rest for 5 minutes before slicing. Drizzle with extra glaze and garnish with fresh herbs (thyme or basil work great).
Expert Tips for the Best Results
Brining for Juiciness – Soak chicken in a saltwater solution (1 tbsp salt per cup of water) for 30 minutes before grilling.
Char Without Burning – If glaze starts to blacken, move chicken to indirect heat.
Alternative Cooking Methods – No grill? Use a grill pan, oven broiler, or air fryer (adjust cooking times accordingly).
Storage & Reheating – Leftovers keep for 3 days in the fridge. Reheat gently to avoid drying out.
Serving Suggestions & Pairings
Side Dishes:
- Grilled Asparagus – Toss with olive oil and lemon.
- Creamy Polenta – Balances the glaze’s tanginess.
- Watermelon Feta Salad – A refreshing contrast.
Wine Pairing:
A slightly sweet Riesling or Rosé complements the peach balsamic flavors beautifully.
Final Thoughts: Why This Recipe Stands Out
Peach balsamic grilled chicken is more than just another BBQ dish—it’s a flavor explosion that’s simple enough for weeknights but impressive for guests. With the right techniques, you’ll never settle for dry chicken again.
-

 Blog3 weeks ago
How to Start a Health Blog: A Step-by-Step Guide for Beginners
-
 Health4 weeks ago
Healthy camping recipe ideas: Nutritious food for great out
-

 Business3 weeks ago
How to Start a Home Health Business: A Complete 2025 Guide
-
 Health1 month ago
Healthy Camping Recipes: Nutritious, Delicious Meals for the Outdoors
-

 Health1 week ago
Mega-Personal.net Health Archives: Ultimate Guide to Wellness
-

 Health2 weeks ago
How to make a manicotti: a step-by-step guide for a classic Italian dish
-

 Food2 weeks ago
What Foods Are Good for Vaginal Health?
-
 Health1 month ago
Is Chobani Yogurt Healthy? A Nutritionist’s Honest Take