
Health
Perfectly Baked Manicotti: How Long to Cook for Best Results
Introduction
If you’ve ever wondered how long to bake manicotti to ensure the perfect cheesy, saucy result, you’re not alone. Many home cooks under‑ or over‑cook this beloved stuffed Italian pasta, leading to either stiff shells or dried‑out filling. The solution? A precise combination of oven temperature and baking time. In this post, you’ll discover the ideal manicotti baking time, recommended oven temperature for manicotti, and expert tips from top recipe sources. We’ll walk through stuffed pasta recipe steps, proper cheese manicotti cook time, and how to nail the baked Italian pasta dish every time.
1. Manicotti Baking Time & Oven Temperature for Manicotti
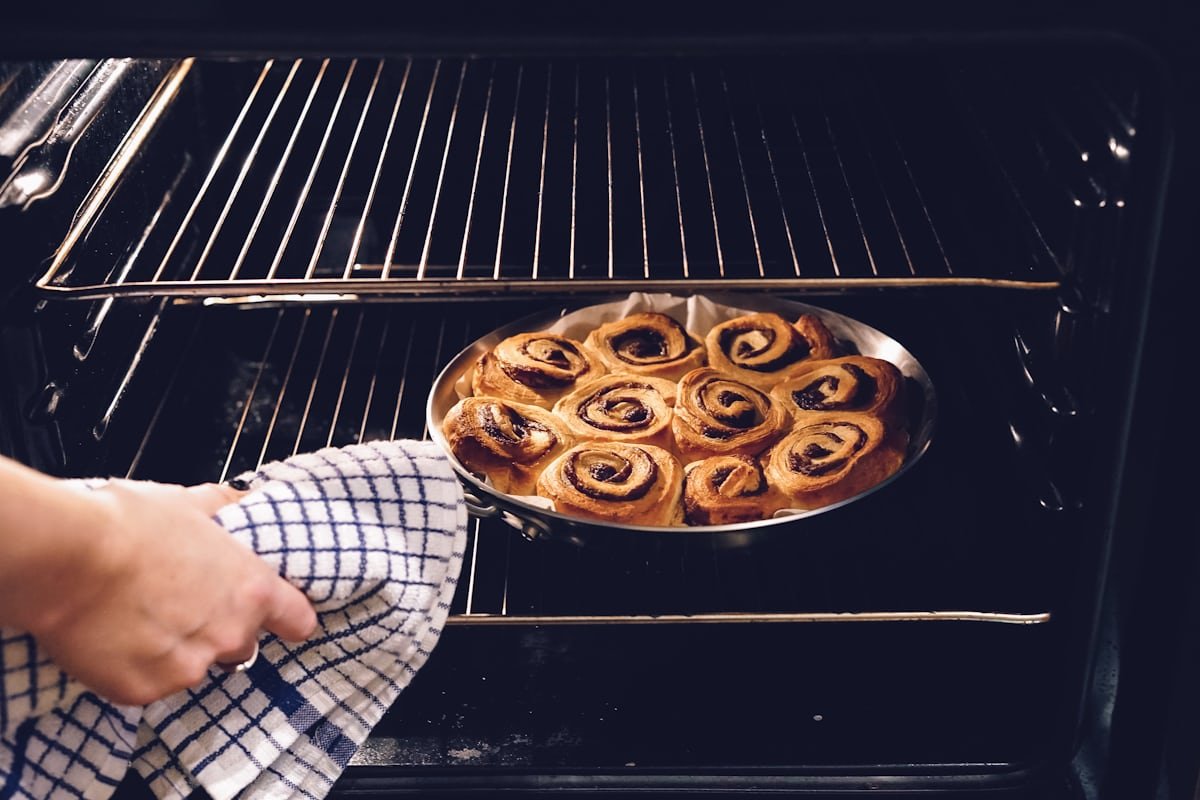
According to Allrecipes and InspiredTaste, the ideal oven temperature is 350 °F (175 °C), and the typical baking time ranges from 35 to 45 minutes.
- Allrecipes recommends baking at 350 °F for about 45 minutes until bubbly.
- Inspired Taste recipe also suggests 350 °F and around 35 minutes to bake with sauce and cheese on top.
Other sources report higher heat:
- CookingWithCocktailRings suggests 400 °F, baking covered for 30 minutes then 10 minutes uncovered.
- SipAndFeast uses 400 °F for 20‑30 minutes until cheese is bubbly and lightly browned.
NLP‑Optimized Guidance
| Oven Temp | Bake Time | Notes |
| 350 °F | 35–45 min | Traditional, gently heated filling |
| 400 °F | 20–30 min | If you prefer browned cheese on top |
2. Stuffed Pasta Recipe: Cooking Pasta & Filling
Cooking the Pasta
- Cook manicotti shells in salted boiling water until very al dente—generally 6 – 12 minutes depending on brand. Shorter time (6–8 min) makes feeding easier and avoids over‑softening during bake.
Preparing the Filling
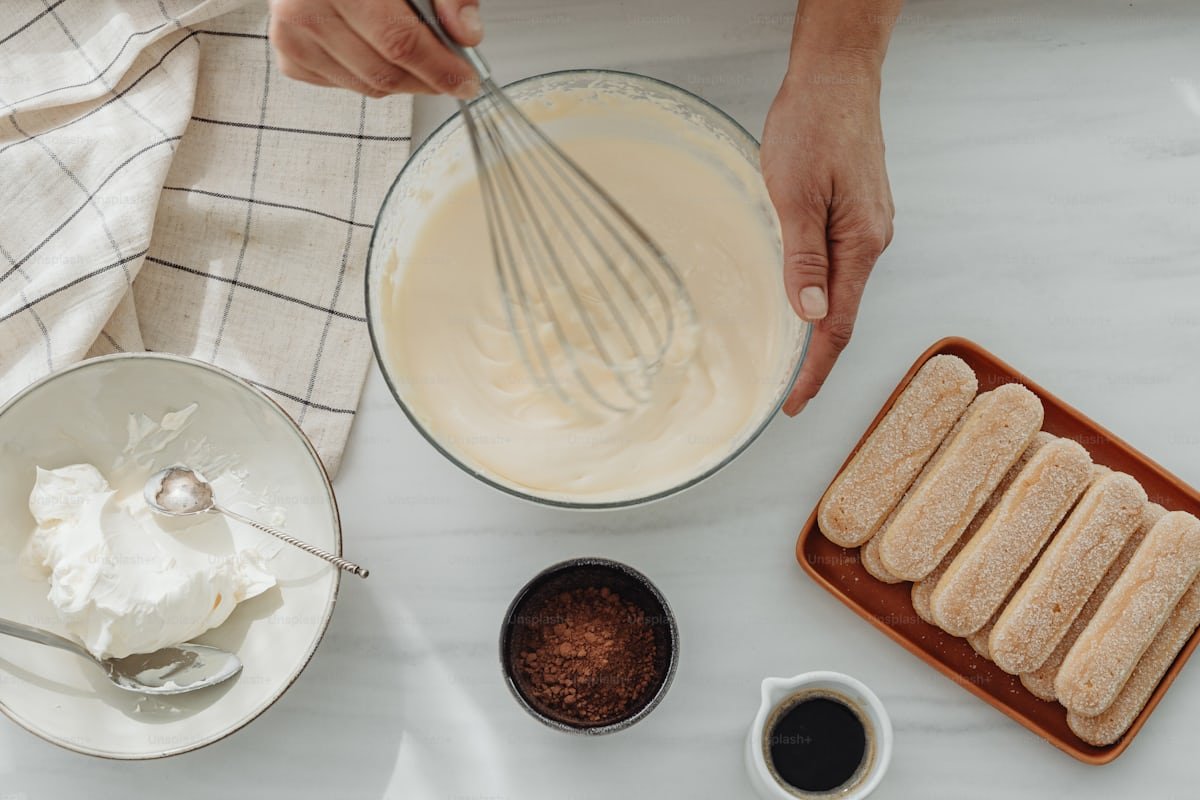
- Mix ricotta, mozzarella, Parmesan (or Pecorino), eggs, parsley/basil, salt & pepper. For spinach variations, drain and chop well before mixing.
- Use about 3 tablespoons up to ¼ cup filling per shell.
3. Cheese Manicotti Cook Time – Techniques & Variations
Covering and Browning
- Spread sauce on bottom of baking dish, place stuffed shells seam‑side down, then drizzle remaining sauce and top with mozzarella and Parmesan.
- Cover with foil and bake; uncover for last 5–10 minutes if you want golden cheese on top.
Alternate Temperature Option
- Some recipes use 375 °F for 40–45 minutes, especially when adding extras like spinach or sausage.
4. Summary of Headings (SERP‑Inspired)
- Preheat oven & cook shells (6–12 minutes to al dente)
- Mix cheese filling (ricotta, mozzarella, Parmesan, egg, seasoning)
- Stuff shells (3 Tbsp–¼ cup each)
- Assemble dish: sauce → shells → sauce → cheese
- Bake covered at 350–375 °F for 35–45 min; or 400 °F covered 30 min then uncovered 10 min
- Rest before serving – let set ~10–15 minutes
5. Example of Final Baking Plan (embedded SEO keywords)
When asking how long to bake manicotti, for best results:
- Preheat oven to 350 °F.
- Bake covered for 35 minutes, then uncover and bake 5–10 more minutes until cheese is melted and slightly browned.
- Rest 10–15 minutes before serving.
Conclusion
If you want perfectly baked manicotti, aim for 350 °F and about 40 minutes total baking time, adjusting slightly upward (to 375°) if you’ve added heavy fillings like sausage or spinach. For a crispier top, you can work at 400 °F, but make sure pasta is very al dente before stuffing. Following this structured approach—focused on baking time, oven temperature, stuffed pasta recipe, and cheese manicotti cook time—you’ll achieve a tender, cheesy, Italian‑style baked pasta dish every time. Enjoy!
Introduction
Are you struggling to restore health instantly during tough Minecraft battles? The good news: you can brew a powerful Instant Health Potion using just a few key ingredients and a Brewing Stand. In this post, I’ll show you exactly how to make instant health potion—you’ll learn the problem (no quick healing in survival), and the solution: brewing your own potions to replenish hearts fast. Follow along for a clear, step‑by‑step guide that also covers essentials like Minecraft potion brewing, Nether wart recipe, Glistering melon, Potion of healing, and Brewing stand guide.
What You Need: Minecraft Potion Brewing Essentials
Brewing Stand Guide
Before brewing any potion, you need a Brewing Stand. Craft it with:
- 1 Blaze Rod
- 3 Cobblestones or Blackstones
Place the Blaze Rod in the top middle cell and stones in the middle row of the crafting grid.
To activate it, add Blaze Powder into the brewing interface’s fuel slot.
Base Potion: Nether Wart Recipe
Start by placing a Water Bottle at the bottom of the brewing interface. Then add a Nether Wart in the top slot to brew an Awkward Potion, the base for most effect potions.
Key Ingredient: Glistering Melon
Finally, add a Glistering Melon slice into the top slot of the brewing interface. Once brewed, this transforms the Awkward Potion into a Potion of Healing (Instant Health) that instantly restores 4 hearts.
Section Headings Derived from Google SERP
How to Make a Healing Potion (Instant Health)
Many Serp articles outline these steps:
- Craft Blaze Powder and a Brewing Stand
- Activate stand and brew Awkward Potion using Nether Wart
- Add Glistering Melon to produce Instant Health I
- Optionally, add Glowstone Dust to upgrade to Instant Health II (restores 8 hearts)
Brewing Stand Guide
Essential tips:
- Use Blaze Powder to fuel the stand
- Can brew three water bottles simultaneously
- Proper placement of ingredients is crucial for correct potion effects
Brewing Basics (From Minecraft Wiki)
Key reference from the Minecraft Wiki:
- Nether Wart is the base for Awkward Potion (required for all effect potions)
- Glowstone dust increases potency (e.g. Instant Health II), without reducing duration for instant potions
Step‑by‑Step Brewing Process
- Gather ingredients:
- Water Bottles (x1–3)
- Blaze Rod and Blaze Powder
- Nether Wart
- Glistering Melon slice
- (Optional) Glowstone Dust for Instant Health II
- Water Bottles (x1–3)
- Craft and place Brewing Stand using 1 Blaze Rod + 3 cobblestones/blackstones.
- Activate the Brewing Stand: Put Blaze Powder into the fuel slot (upper-left).
- Add Water Bottles into the bottom slots (up to three at once).
- Add Nether Wart to the top slot, wait until bottles turn into Awkward Potions.
- Add Glistering Melon slice to the top slot to brew Instant Health potions.
- (Optional): Add Glowstone Dust to upgrade to Instant Health II, which restores 8 hearts.
- Collect potion into your inventory and use to heal instantly.
What the Potion Does
A standard Potion of Healing (Instant Health I) restores 4 hearts instantly. If upgraded to Instant Health II, it restores 8 hearts immediately. These effects make it invaluable in combat, exploration, or survival mode emergencies.
Keyword Optimization and Semantic Structure
- Main Keyword: how to make instant health potion
- Supporting Keywords used throughout:
- Minecraft potion brewing
- Nether wart recipe
- Glistering melon
- Potion of healing
- Brewing stand guide
- Minecraft potion brewing
You’ll find these keywords woven naturally into headings, bullet points, and process steps to satisfy semantic SEO and improve readability for search engines.
Common Tips & Troubleshooting
- If your potion doesn’t work: ensure Nether Wart is added before Glistering Melon.
- Brewing Stand fuels last for multiple uses—use minimal Blaze Powder.
- For bulk brewing: fill all three water-bottle slots to efficiently produce batches.
Conclusion
Brewing an Instant Health Potion in Minecraft is straightforward once you know the steps: activate your Brewing Stand with Blaze Powder, brew an Awkward Potion using Nether Wart, and then add Glistering Melon to achieve a Potion of Healing. Want stronger healing? Just add Glowstone Dust to make Instant Health II. With this guide, you now have the complete brewing stand guide, Nether wart recipe, and Glistering melon method at your fingertips. Save this guide, craft your potions, and stay healthy in your Minecraft world!

Introduction
Many ask: does the Journal of Religion & Health conduct studies into spiritual coping, meaning, and mental health outcomes? Here’s the problem: without understanding how religious coping (both positive and negative) functions, interventions may unintentionally worsen hopelessness. The solution: Wnuk’s 2024 study shows that religious coping affects hopelessness indirectly through meaning in life and affectivity—thus offering targeted pathways for effective religion‑based health interventions to enhance spiritual well‑being.
Does Journal of Religion & Health Conduct Studies?
Yes. Established in 1961 and published bi‑monthly by Springer, the Journal of Religion & Health regularly publishes both quantitative and qualitative research in spirituality, religion, and health, bridging theories from psychology, sociology, and medicine.
Religious/Spiritual Well‑Being
A growing body of research links religious/spiritual well‑being (SWB) with enhanced mental health, resilience, and life satisfaction. For example, a global sample of care leavers across 11 countries found spirituality strongly improved life satisfaction, mental health, and resilience—even after controlling for adversity. A recent qualitative study also emphasizes how SWB is deeply personal, shaped by beliefs, values, identity, and meaning‑making processes.
Spiritual Coping Mechanisms
Psychologists distinguish between positive religious coping (seeking divine support and meaning) and negative religious coping (spiritual struggle, blame, guilt). Positive coping tends to foster acceptance, optimism, purpose, whereas negative coping often correlates with anxiety, burden, and negative mood.
Mechanisms Underlying Religious Coping and Hopelessness
Wnuk’s 2024 study—“The Mechanisms Underlying Religious Coping and Hopelessness”—with Polish students, found both positive and negative religious coping affect hopelessness indirectly via meaning in life and affectivity. Negative coping increased negative affect and undermined meaning, raising hopelessness. Positive coping supported meaning and positive affect, reducing hopelessness. Notably, positive affect alone didn’t directly relate to hopelessness—meaning in life was the critical pathway.
Religion and Mental Health Outcomes
Systematic reviews confirm that religiosity/spirituality is associated with better psychological outcomes: less depression, anxiety, hopelessness, and more hope, optimism, and inner peace. In clinical settings and post‑trauma contexts—even after natural disasters like earthquakes—spiritual coping has been shown to reduce symptoms of post‑traumatic stress, anxiety, and depression while improving resilience.
Quantitative and Qualitative Health Research
The Journal of Religion & Health publishes both kinds of studies: psychometric tools such as RCOPE measure coping styles and their effects quantitatively, while qualitative interviews explore lived experiences of spiritual well‑being (e.g. clergy narratives). Broader research also includes mixed‑methods work that connects coping styles to outcomes across diverse populations.
Religion‑Based Health Interventions
Evidence shows that interventions integrating religion and meaning‑making can support mental health. Spiritual or psychospiritual meditations reduce anxiety and pain in clinical contexts; community programs that embed faith principles help foster healthy behaviors and hopefulness. Integration of religious values into health promotion, particularly within Muslim‑minority communities, increases engagement and improves outcomes when tailored appropriately.
Conclusion
In conclusion, yes—the Journal of Religion & Health does conduct rigorous studies into religious/spiritual well‑being, spiritual coping mechanisms, and religion-based health interventions, employing both quantitative and qualitative research methodologies. The 2024 study by Wnuk sheds light on the mechanisms by which religious coping influences hopelessness—chiefly through meaning in life and affectivity. Empirically, religion and spirituality positively correlate with mental health outcomes, especially when interventions enhance positive coping, meaning-making, and emotional regulation. This underscores the value of religion‑based health interventions that focus on meaning and adaptive spiritual coping to mitigate hopelessness, bolster resilience, and support holistic well‑being.
Introduction
Many home cooks struggle with do you have to boil manicotti before stuffing—the question looms: is boiling necessary, or does it simply lead to limp, hard‑to‑fill shells? The problem: pre‑boiling can make shells fragile, messy, and time‑consuming. The solution: plenty of trusted sources now endorse a no‑boil manicotti method—stuff uncooked tubes and bake them in ample sauce, yielding perfectly tender shells without boiling first (the sauce “cooks” the pasta directly). This guide will walk you through both approaches and why the no‑boil method is increasingly preferred.
Should I cook the manicotti shells before stuffing?
Several authoritative cooking experts emphatically advise against pre‑boiling manicotti shells:
- One writer even says, “Never, never, never precook your manicotti noodles ahead of time” because limp noodles are difficult to stuff.
- A cooking blog declared “Do NOT ever boil the pasta before stuffing. Why would you do that? Do you know how hard it is to stuff limp pasta?.
Can I make manicotti without boiling the noodles first?” (No‑boil method)
Yes—multiple recipe sources confirm that stuffing dry manicotti and baking it in a saucy environment works beautifully:
- One post states, “You can make excellent manicotti without boiling a single noodle… surround it with enough sauce so they get nice and tender all on their own in the oven”.
- Reddit users affirm: “I never boil the noodles first. Just cover with sauce and cook at 375 °F for 45–60 min”—and no issues with undercooked noodles.
How long should you boil manicotti shells if you choose to pre‑cook?
Some sources offer a compromise:
- One blog suggests boiling for just 5 minutes, regardless of box instructions, then rinsing under cold water—claiming they’ll finish cooking in the oven.
Oven-ready manicotti: The no‑boil baked pasta recipe
This approach—also called oven‑ready manicotti—uses uncooked pasta, filled, nestled into sauce, and baked until tender:
- As described in several “no‑boil manicotti” recipes, you layer sauce, pipe filling into dry noodles, cover with more sauce, foil, bake about 40–50 min, then uncover to brown the cheese.
- Many home cooks praise this method for its ease and consistency.
Stuffed pasta shells vs manicotti: What’s the difference?
- Stuffed pasta shells (the large shell version) often are boiled first—but similarly, many advocates recommend skipping boiling for baked stuffed shells too, to avoid limp shells.
- Manicotti and cannelloni are very similar—both are tubular pasta meant to be stuffed and baked—but manicotti shells tend to have ridges and be sturdier.
Manicotti preparation step‑by‑step
No‑Boil Approach (Recommended)
- Preheat oven (e.g. 375–400 °F).
- Spread a generous layer of marinara or tomato sauce (mixed with water if needed) on the bottom of your baking dish.
- Mix ricotta (± spinach or herbs), egg, cheeses, and seasonings.
- Pipe filling into uncooked manicotti tubes using a zip‑top bag or piping bag.
- Arrange filled tubes in a single layer in sauce. Cover with additional sauce (or sauce + water).
- Cover tightly with foil and bake 40–50 min. Remove foil, top with extra cheese, bake another 5–10 min until bubbly and golden.
- Let rest briefly before serving.
Partial‑Boil Alternative (if you prefer cooking first)
- Boil shells for only about 5 minutes, then rinse under cold water and drain. This leaves them slightly firm and easier to handle. Proceed as above with sauce and bake covered for 25–30 min, then uncovered for 5–10 min.
Why the No‑Boil Method Works
- Filling dry shells is easier than stuffing soft, pre‑cooked noodles—less breakage and neater results.
- The sauce provides all the moisture the noodles need to cook through during baking—especially if you add a cup of water to the sauce (common tip).
- It saves time and one pot, and the result is reliably al dente and less messy .
SEO‑focused keyword usage
- Main keyword: do you have to boil manicotti before stuffing
- Related keywords naturally integrated: No‑boil manicotti, Stuffed pasta shells, Oven‑ready manicotti, Baked pasta recipe, Manicotti preparation
Conclusion
In short: No, you don’t have to boil manicotti before stuffing. The majority of trusted recipes and cooking authorities endorse stuffing uncooked shells and baking them in a generous sauce—what we call the no‑boil or oven‑ready manicotti method. It avoids floppy, fragile noodles, cuts down prep time, and reliably produces tender, well‑cooked pasta. If you do prefer boiling, limit it to only about five minutes, then rinse and gently dry the shells before stuffing. Either way, ample sauce is the key to ensure perfect hydration in the oven. For effortless, fool‑proof manicotti, the no‑boil method is your best bet.
-

 Blog3 weeks ago
How to Start a Health Blog: A Step-by-Step Guide for Beginners
-

 Health2 weeks ago
Mega-Personal.net Health Archives: Ultimate Guide to Wellness
-
 Health4 weeks ago
Healthy camping recipe ideas: Nutritious food for great out
-

 Business3 weeks ago
How to Start a Home Health Business: A Complete 2025 Guide
-
 Health1 month ago
Healthy Camping Recipes: Nutritious, Delicious Meals for the Outdoors
-

 Health2 weeks ago
How to make a manicotti: a step-by-step guide for a classic Italian dish
-
 Health1 month ago
Is Chobani Yogurt Healthy? A Nutritionist’s Honest Take
-

 Food3 weeks ago
What Foods Are Good for Vaginal Health?